Welcome to Commotion! This article will hopefully explain just what we do and how to use us in full depth. At our core, we want to make integrating forms with Notion as seamless as possible. With us, you can create forms that you can embed in Notion pages and that save results into a Notion database, so you never need to leave the platform. Here's how you get started.
1. Create a Notion database
This one is fairly straightforward. Go into your Notion workspace and create a Notion database like below.
 From here, you can add and remove columns to fit what you need. Each column can have a specified type, like a number, text, email, file, etc.
2. Create a Commotion account
Head over to Commotion.page and sign up for an account. We're a freemium service, so sign up and use us for free for as long as you like and upgrade to Pro only when you want!
3. Connect to your Notion account
You'll need to connect your Notion account in order to create forms with us. Don't worry, Notion has a super easy flow, so just press the connect button, select which pages you want to create forms for, and hit allow access.
4. Select a Notion database
Now that you've connect your Notion account, let's actually start creating forms. Head to the dashboard and hit the "Create a New Form" button, and we'll get started. Select which workspace and page that contains the database you want to save to. Then, hit "Create Form".
5. Configure this new form
This is where things get fun. If you're in a rush, you don't need to do anything, just hit "Create Form" and you're set. However, this is where Commotion starts to shine. Firstly, you can update the title of the form and add a description. Additionally, you can drag each question around to the order you want them to appear, and then do things like update the title of a question, the default value, the placeholder text, and any additional info, and even make questions required or just hidden from the form.
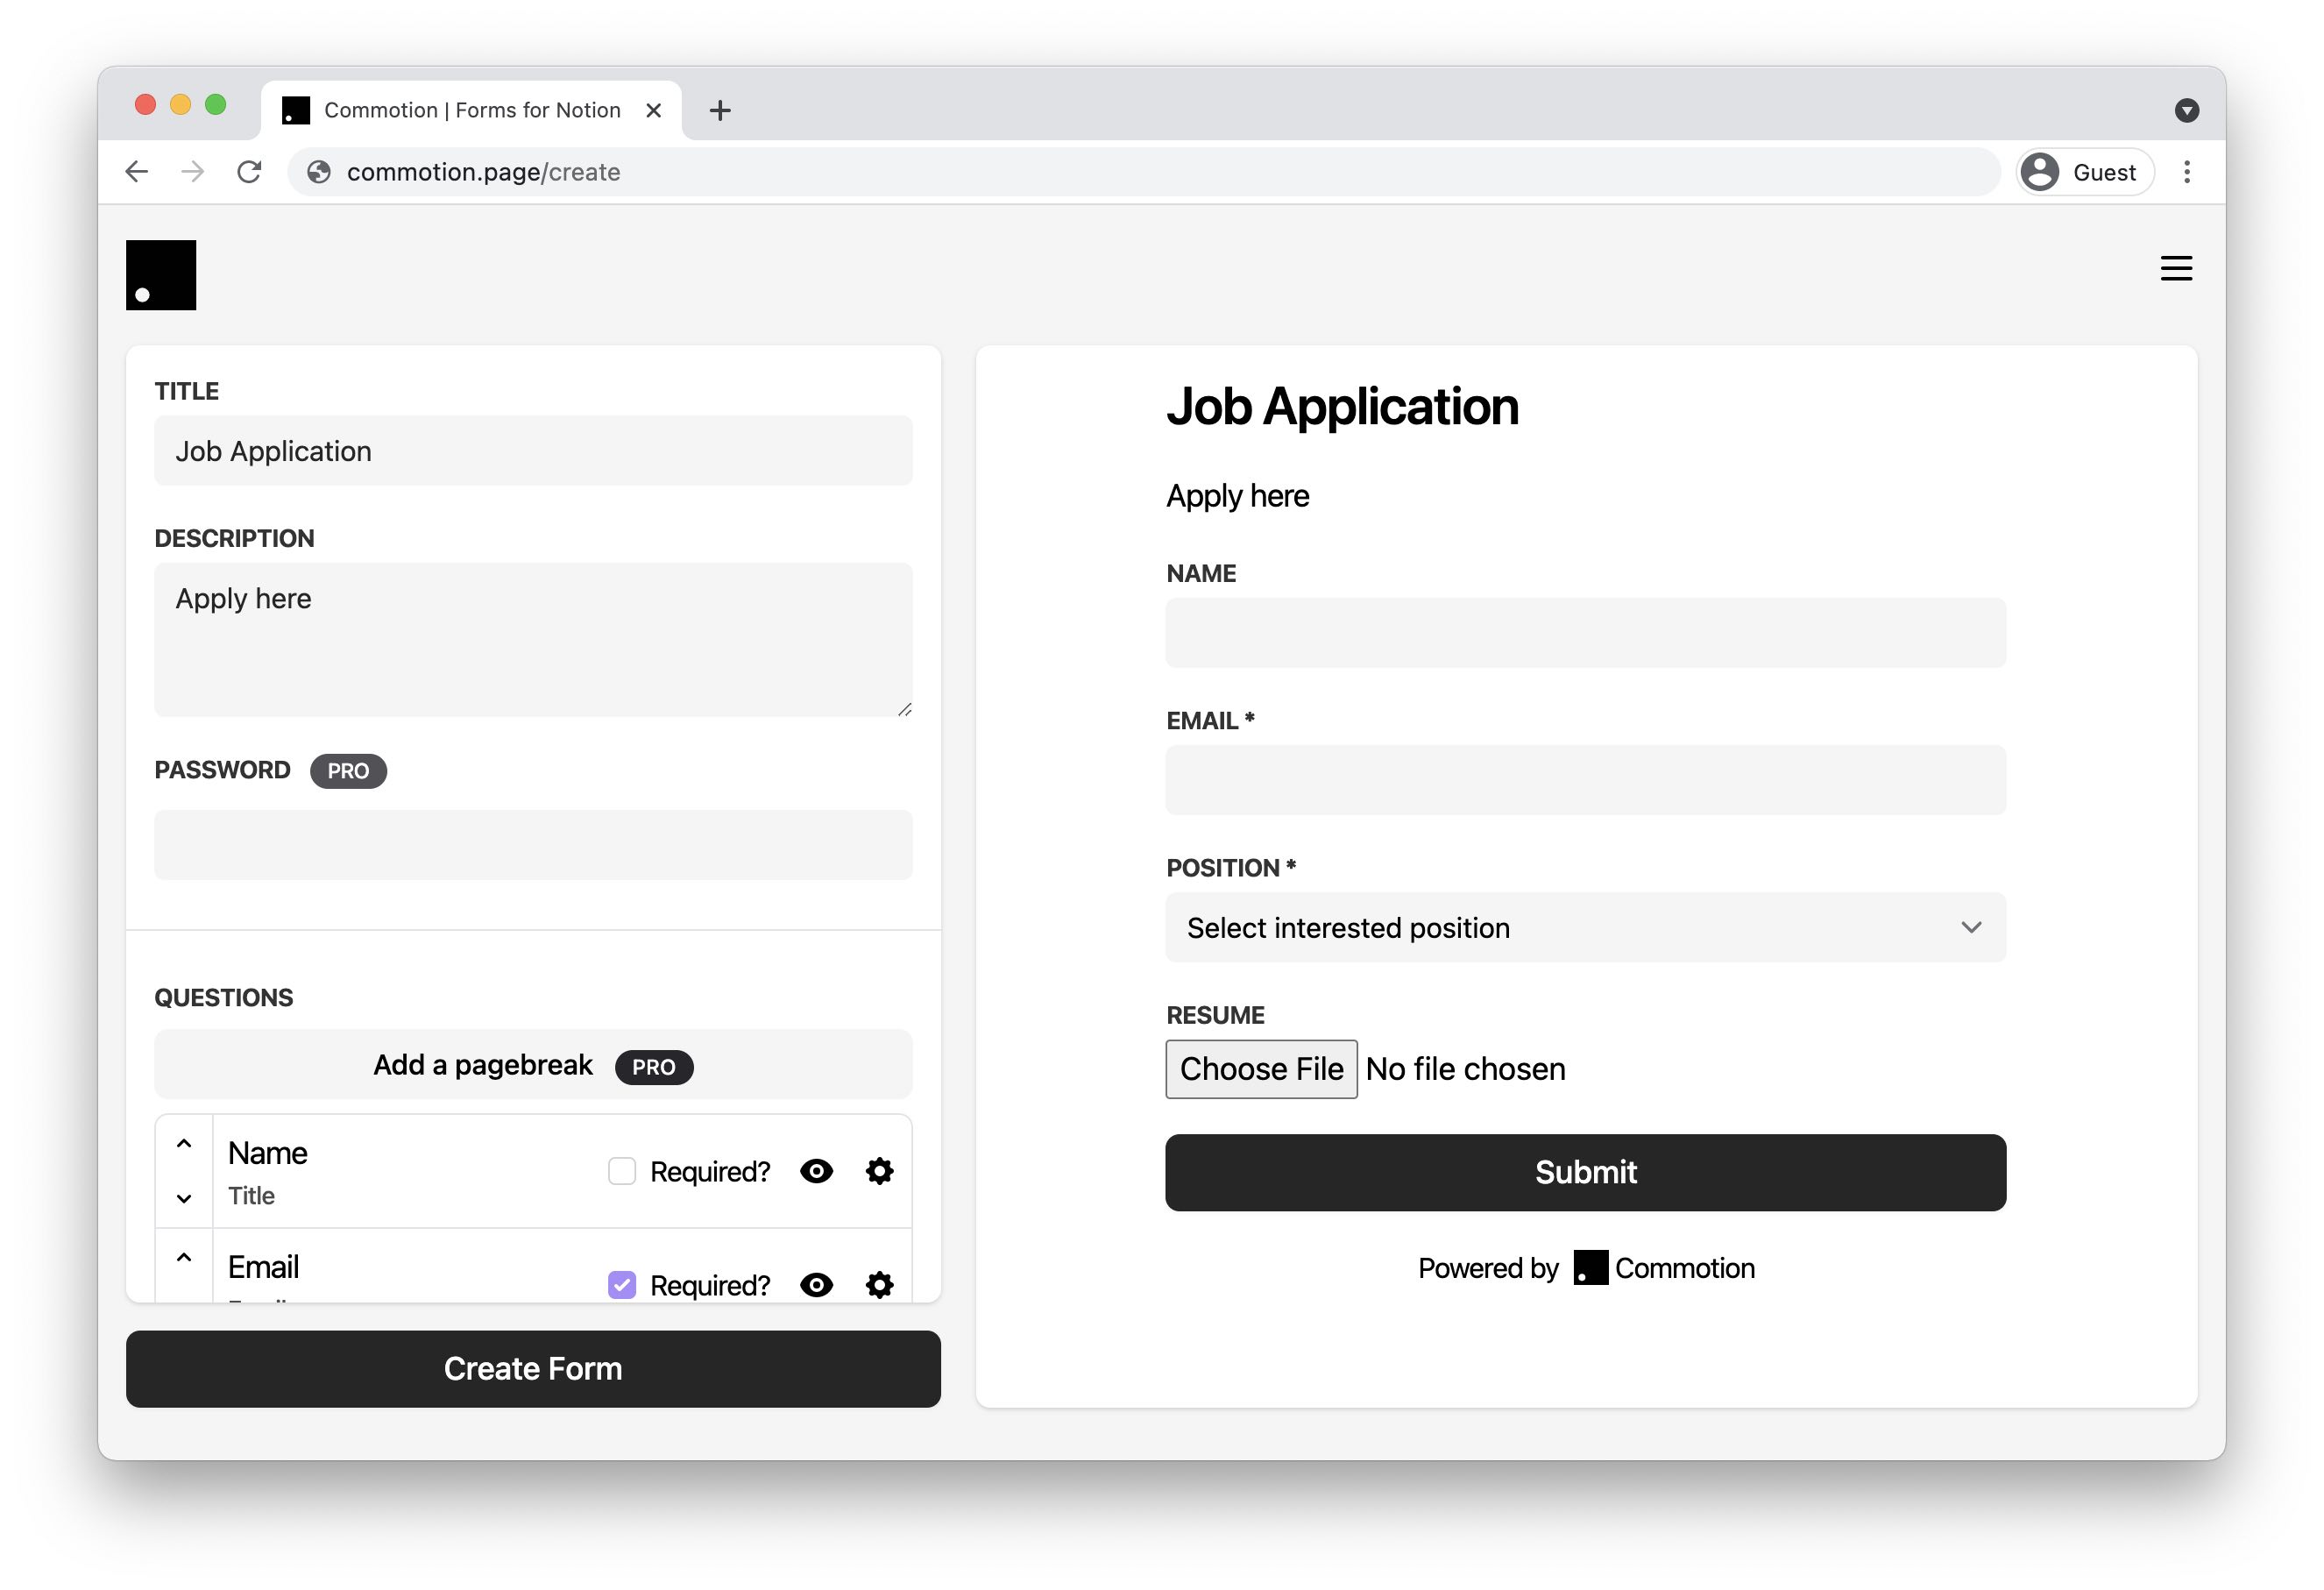
Those are the basics. If you upgrade to our Pro plan, you can do even more with Commotion. For the form, you can add page breaks that paginate the form, changing it from one long list of questions to several screens that users can go between. Very stylish. Also, you can add a password so only some people can see and fill out the form. Finally, our Pro plan supports file uploading, so if you're collecting resumes for example, you can create a simple resume drop form here.
Another perk of our Pro plan is the functionality once someone does fill out a form. With the Pro plan, once someone completes the form, you can receive an email with that person's response and a confirmation email can be sent to the responder as well. Additionally, if you want to do more with the data, you can send it to a webhook of your choosing. Easy peasy.
6. Share and embed the new form
Once you hit "Create Form", you'll be moved to a page that has a link you can embed. With this embed link, you can paste it into a Notion page.

You can embed this link anywhere. The most common way to do this is using an iframe like so...
<iframe height="530" width="490" src="https://commotion.page/embed/..."></iframe>... where you adjust the height and width and src link. You can paste this in anywhere you write html.
If you don't want to go through the hassle, you can also just hit "View Form" and share the link for people to fill out.
7. Start collecting responses!
You're all done! You can now sit back and just collect responses in your Notion database. If you ever need help, we're always available via live chat on our website, or just at our email support@commotion.page.